Census enables anyone to be a data engineer!
With Census, you don’t have to be a data engineer or a SQL programmer to configure your Data Warehouse to be a single source that feeds all of your company’s business apps.
Census enables you to easily create connections from your Data Warehouse (Data Sources such as Snowflake, SQL Server, and many more) to your business applications (Destinations such as Hubspot, Salesforce, and many more). Then Census maintains the flow of your data (via Syncs) from Source to Destination.
If you don't find a Destination you need in the large list of preconfigured Destinations in Census, you can easily build a Census Custom API to work with your Destination.
In this article, you’ll learn how easy it is to:
-
Connect Census to your data source.
-
Connect Census to your destination app.
-
Create a Model (data subset).
-
Create a Census Sync between your source and destination.
-
Further refine your data with reusable Census Segments.
Connect Census to your data source
The first step on your journey is to create the connection from Census to your data source.
Check the specific instructions for your data source in the Census Docs.
Generally, those instructions are as easy as this:
-
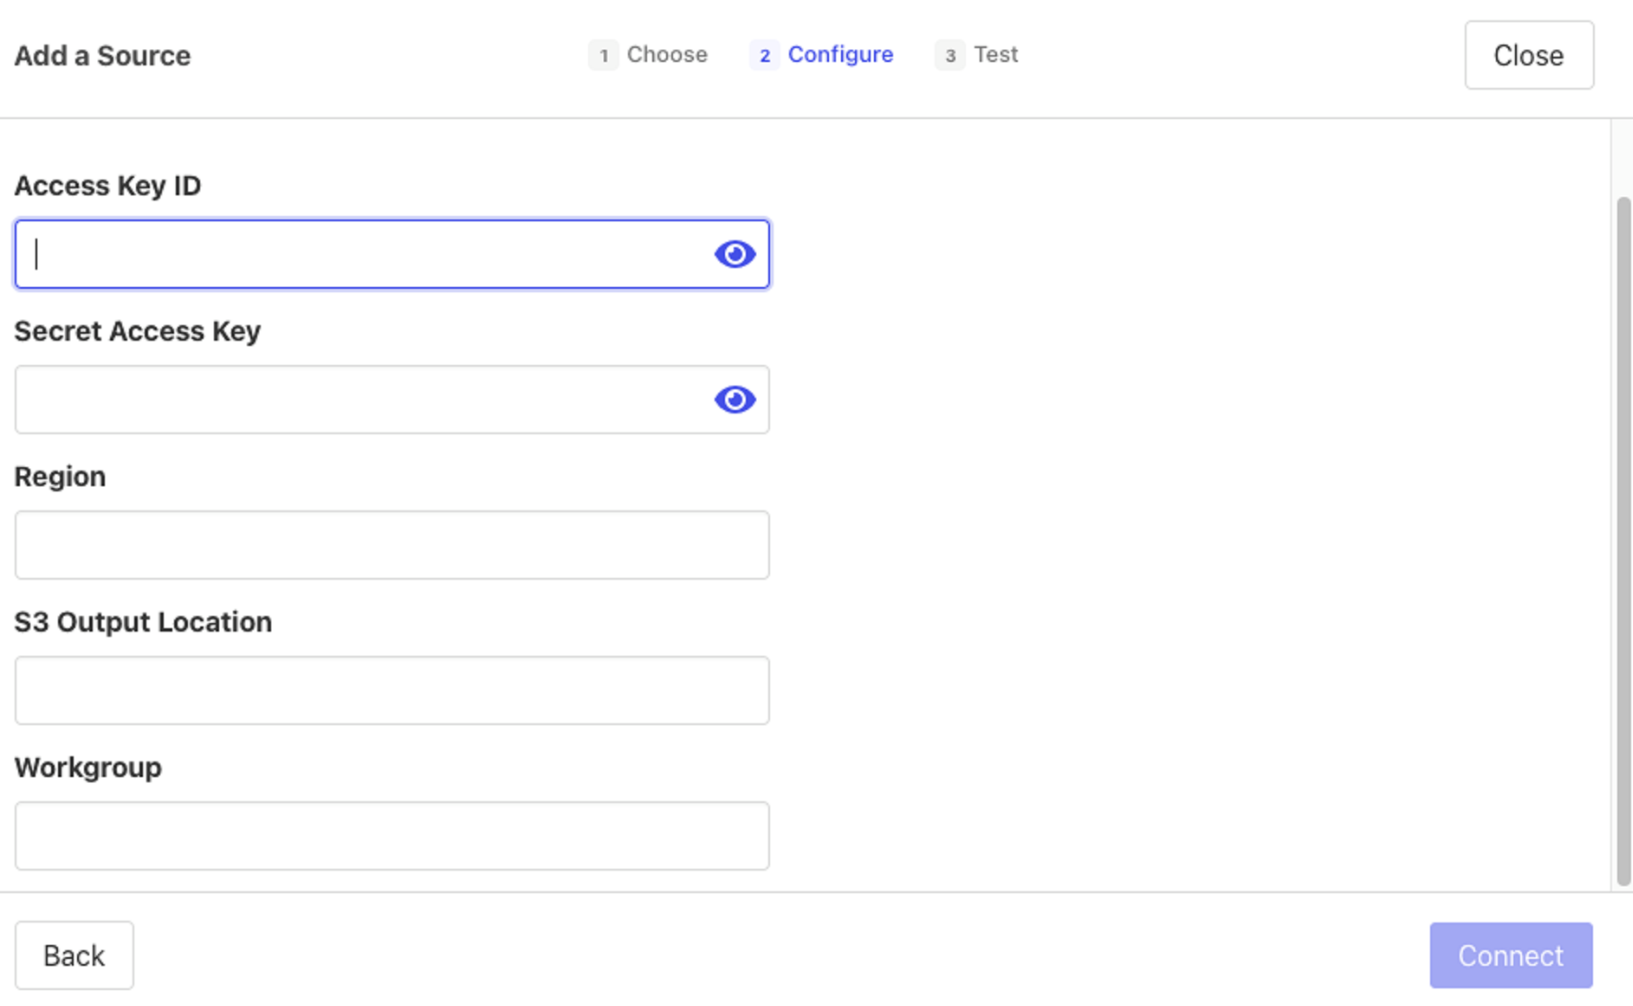
Open Census, go to Connections, click Data Sources, click Add Data Source, and select your data source.
-
Fill out a few fields in Census. Check the page for your data source in the Census Docs, because you will often find a preconfigured script or other information that makes filling out these fields even easier.
-
Click the Test button to perform a test that verifies your connection.
That's it! Census is now connected to your data source. You're ready to connect Census to your destination app.
Connect Census to your destination app
Now you can harness the power of Census by connecting Census to your destination app, and then using Census to sync from your connected data source to your destination.
Check the specific instructions for your destination app in the Census Docs. For the full list of destinations and instructions, see this page.
Generally, those instructions go something like this:
-
Gather some basic information from your destination app, which can include Administrator credentials, API Key, API Secret, and so on.
-
In Census, go to the Connections page, click Add Service, and select your destination app.
-
Complete the other fields of information that Census needs, which generally include the information you gathered in Step 1.
-
Click Connect.
You now have your data source and destination connected to Census. You're ready to specify the data you want to sync between the source and destination.
Connect Census to other destination apps with Census Custom API
With Census, you aren’t limited to connecting to only destinations with our preconfigured destination app connections. You can create a Census Custom API to connect to any app that has a URL that Census can access over the internet!
At the highest level, you can think of your Census Custom API in two phases:
-
In the Sync Planning phase, you use three API methods: list_objects, list_fields, and supported_operations. These three methods, respectively, get a list of objects to write to, a list of fields for those objects, and the types of operations (such as update) that can be performed on those objects. For full details about these methods, see list_objects, list_fields, and supported_operations.
-
In the Sync Execution phase, you use the get_sync_speed method, which controls the speed at which Census sends data to your API. You also use the sync_batch method, which syncs a batch of records to your destination and reports success or failure. For full details about these methods, see get_sync_speed and sync_batch.
For your Census Custom API, you can currently perform three operations on your data:
-
insert: This only creates records in your destination. It can’t modify records.
-
update: This only modifies records in your destination. It can’t create records.
-
upsert: This is the most commonly used operation. It can create and modify records in your destination.
Census helps you ensure that your Custom API is secure. Check out Security Considerations to learn more.
To get a feel for what you can do with a Census Custom API, configure a quick Demo API.
Create a Census Model for your data source
Models in Census are queries that define a subset of data from your data source that you want Census to sync into your destination app. If you already have some data modeling in your data source, your Census Model can be simple. Or if you have a data modeling integration with dbt or Looker, you can connect that with your Census Model. If you need to model from scratch, that is also no problem. You can create a simple or complex Census Model to fit your needs.
Here are the general steps:
-
In Census, go to Models, and click Add Model.
-
In the Query field, enter the SQL that defines your needed subset of data.
-
Click Preview to verify that your query retrieves the data you want.
-
Click Save Model.
Create a Census Sync
In Census, your Sync will define how you want Census to sync your data (based on a Census Model or as a whole) between your data source and your destination app.
With Syncs, you harness the great power of Census. Census Syncs don’t rely on events to initiate a sync. They sync whenever data in your model changes, so that your data source and your destination are always in sync!
Here are the general steps:
-
In Census, go to Syncs.
-
Click Add Sync.
-
Under What data do you want to sync?, select your data source in the Connection field, and select your Model in the Source field.
-
Under Where do you want to sync data to?, select your destination app in the Connection field, and select your object (such as User) in the Object field.
-
Under How do you want to update the destination?, decide how you want to update and make a selection. Usually, you select Update or Create so that Census will update existing records and create new records for any that are missing.
-
Under How are source and destination records matched?, select a field from your source and a field from your destination app that will determine when records match.
-
Under Which fields should be updated?, map fields in your source to fields in your destination app.
-
Click Next.
-
Confirm the sync details, and click Create Sync.
You can now run your Sync manually, or you can create a detailed schedule to control when it runs.
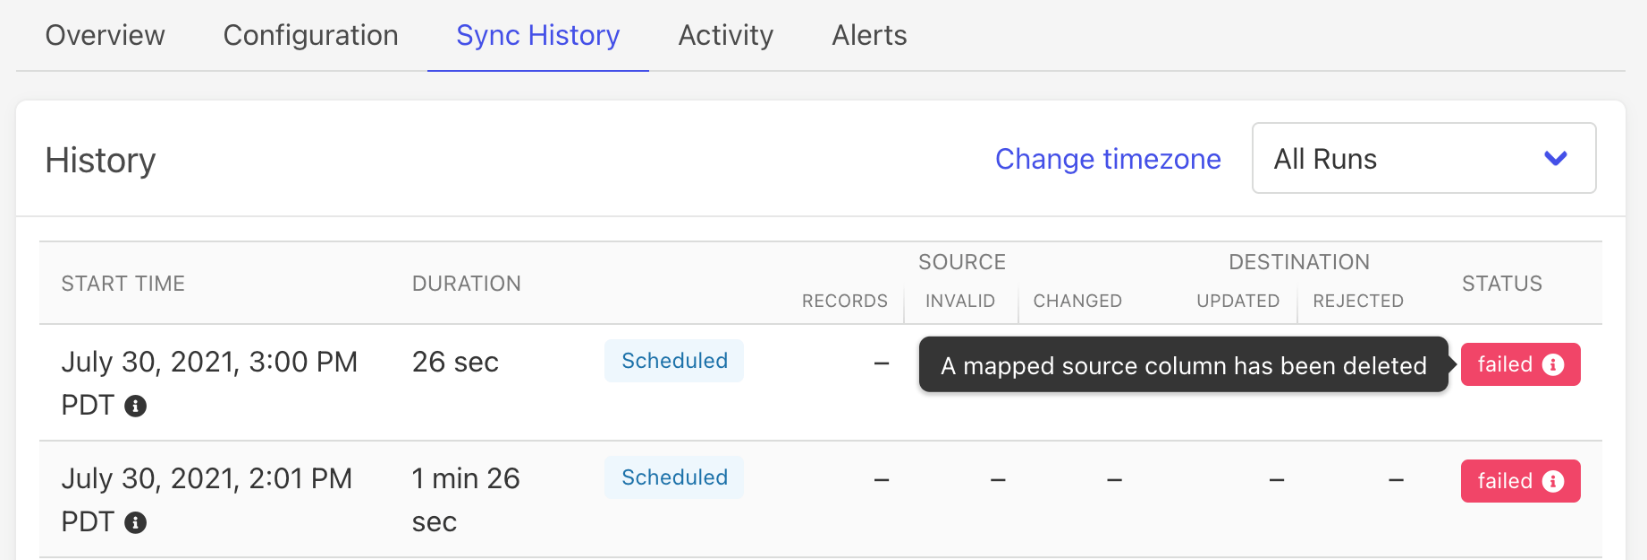
After you run Syncs, you can view your Sync History for valuable insights about:
-
Failed Syncs
-
Invalid records
-
Rejected records
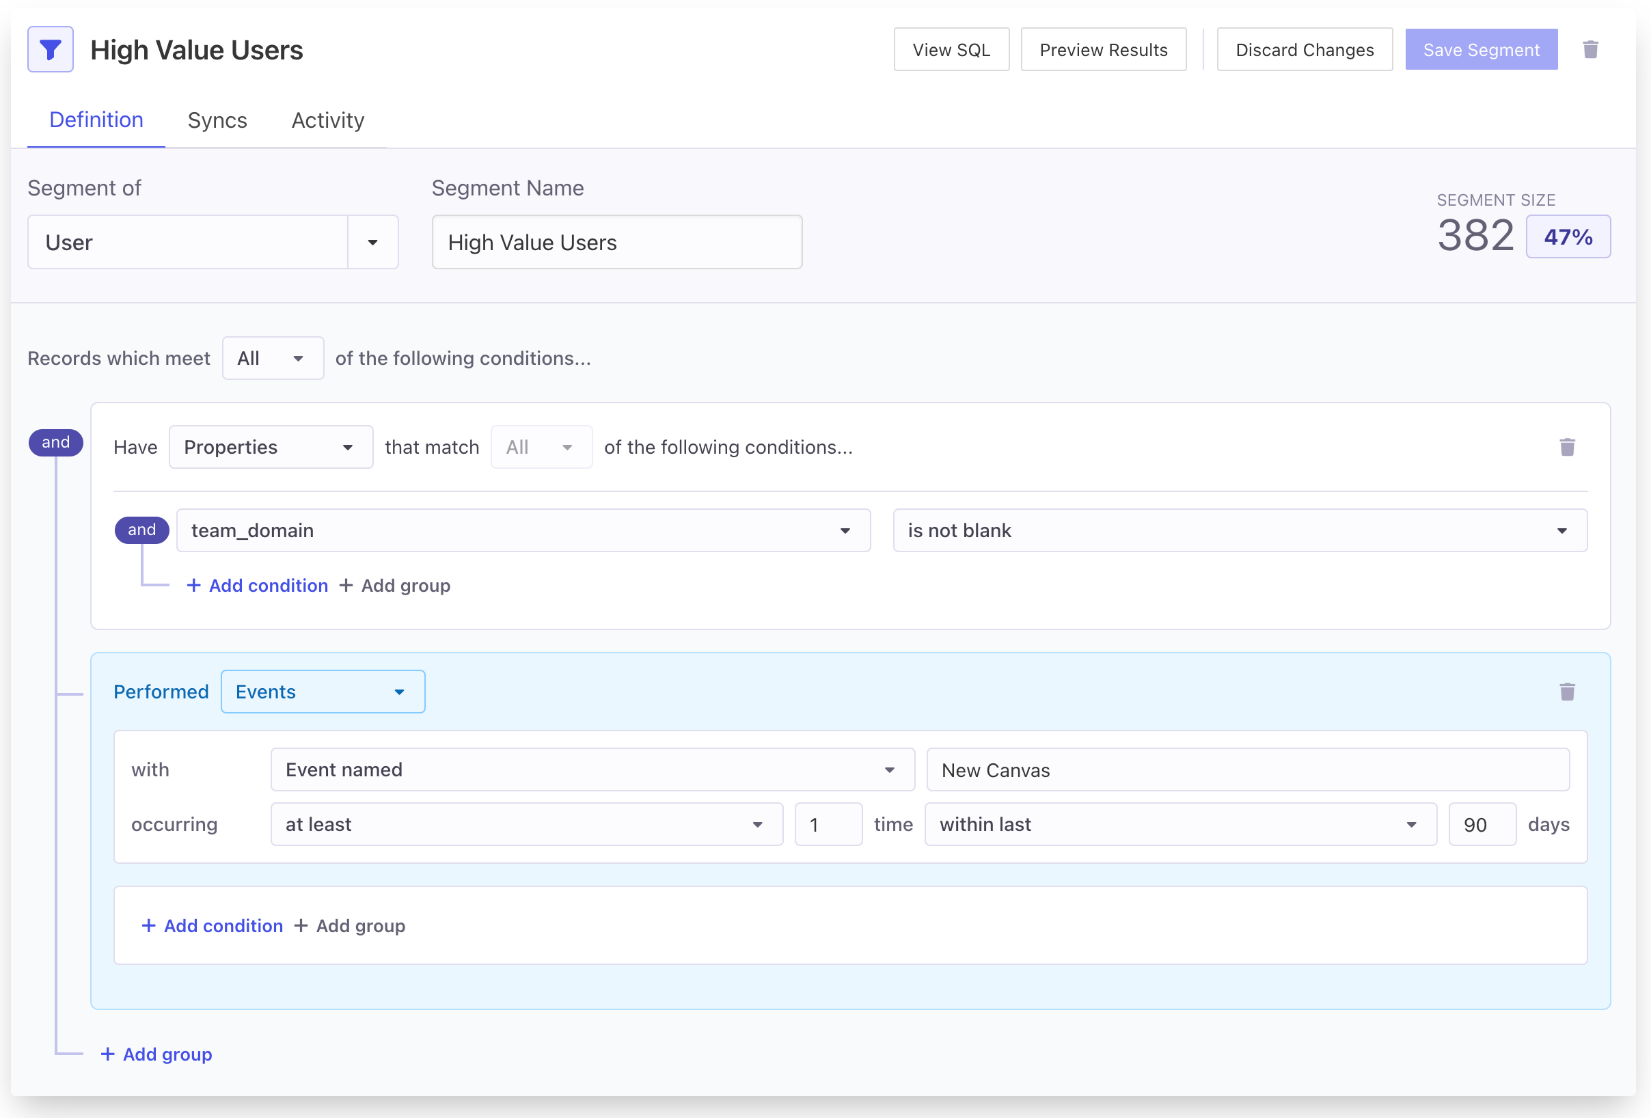
Create a Census Segment
Segments are another option (in addition to Models) that you can use to define a subset of the data from your data source. Some of your destination apps allow you to define segments inside them. But to realize the benefits of a segment that you can use to keep the segment data in sync across multiple destination apps, create a Census Segment. Census Segments also have the convenience of being simple to create with Census's easy visual builder. No SQL needed!
Take your data to the next level!
You can always find the full instructions to accomplish any data magic you desire in the Census Docs.